Construction steps to make a straight boxy shirt:
Marking:
- Measure desired waist and mark. (24cm – 26cm from CF)
- Pin the original flat-fell seam so that the center of that seam is distinguishable and not moving.
- Mark all the way from the bottom of the shirt through the waist and through the sleeve. Note: You may want to preserve the sleeve and armhole point as much as possible, so perhaps curve into the armhole / sleeve area instea.
- The sleeve doesn’t need to be trimmed out consistently, so draw a line that makes sense
- Transfer line information to other sleeve. (Or, seam through the first bodice, and mark on to other side)
- Seam from the bottom of the shirt through to the sleeve following the points.
- Cut through original flat-fell seam line to release fabric.
- Mark out 1/2″ inch from new seam line and cut through.
- Cut the front allowance fabric back to 1/4″
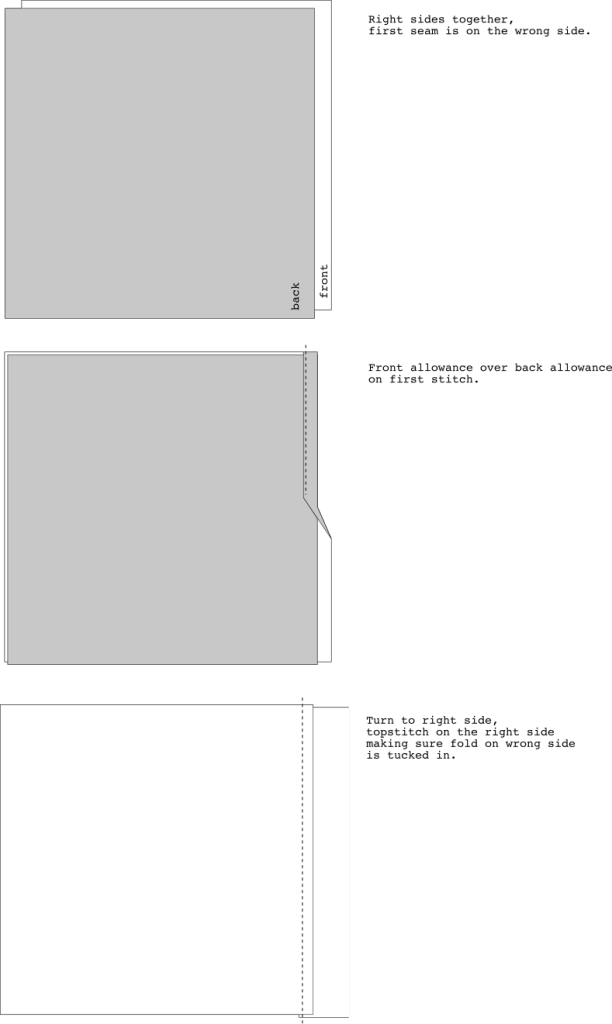
- Flat-fell seam through side seam. Remember to keep sleeve turned inside out while top stitching so that you can fold seam allowances in from underneath.
- Mark off hemline and roll-hem seam
- Fold back wrist openings and topstitch into place
- Remove collar and edgestitch collar stand
